OEM: Verifying Connected Car Settings (CCS) - Ford OEM Vehicles
Ford OEM Vehicles
When your Ford OEM-registered vehicle isn’t reporting data as expected, one of the first things to check is whether the vehicle’s Connected Car Settings (CCS) are properly enabled. These settings control the vehicle’s ability to share telematics data through Ford Fleet Telematics, and they can sometimes be toggled off — either by the driver, during transport mode, or after a software update.
This article walks through how to verify and enable the correct CCS settings on Ford vehicles. These steps are supplemental — they may not be required in every case, but they’re a reliable place to start when a Ford OEM device isn’t reporting properly.
Step 1: Initial Vehicle Reset
Before diving into the in-vehicle menus, start here. This quick reset sequence helps ensure the vehicle is out of transport mode and gives the connectivity settings a chance to initialize.
- Start the vehicle with the ignition on and confirm it has been taken out of transport mode.
- Verify that Connected Car Settings (CCS) are enabled (see Step 2 below for how to check this).
- Turn the vehicle off.
- Turn the ignition back on and allow the vehicle to run for approximately 5 minutes. The vehicle may be driven during this time.
After completing these steps, the vehicle’s connectivity settings should be active, and the device should begin reporting.
Step 2: Verifying Connectivity Settings in the Vehicle
The exact navigation path will vary depending on the vehicle’s SYNC version, but the goal is the same: confirm that Vehicle Connectivity, Location, and Vehicle Data & Remote Control are all toggled ON.
General Path (Most Ford Vehicles):
- Turn on the vehicle and go to the touch screen.
- Tap Settings.
- Select FordPass Connect (scroll down if it’s not immediately visible).
- Tap Connectivity Settings.
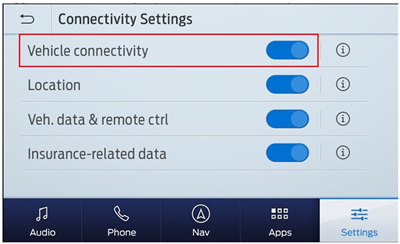
- Confirm the following toggles are all switched ON (slid to the right):
- Vehicle Connectivity
- Location
- Vehicle Data & Remote Control
If any of these are toggled off, enable them and then complete the reset sequence in Step 1.
SYNC Version-Specific Navigation
If you are unsure where to find these settings, use the guide below based on the vehicle’s SYNC version. The SYNC version is usually visible in the system settings or on the about screen of the infotainment display.
SYNC 3
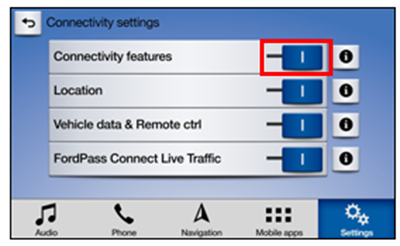
- Turn on the vehicle.
- Tap Settings on the SYNC 3 touch screen.
- Select FordPass® Connect.
- Tap Connectivity Settings.
- Ensure all connectivity settings are enabled. Toggle any that are off back to ON.
SYNC 4
- Press Settings on the SYNC 4 touch screen.
- Press Connectivity.
- Choose Connectivity Vehicle Features.
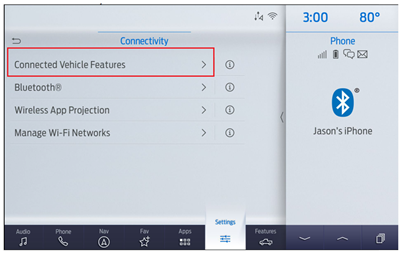
- Toggle Vehicle Connectivity to ON.
Tip: Ford recommends keeping Vehicle Connectivity toggled ON for the best update experience.
SYNC 4A
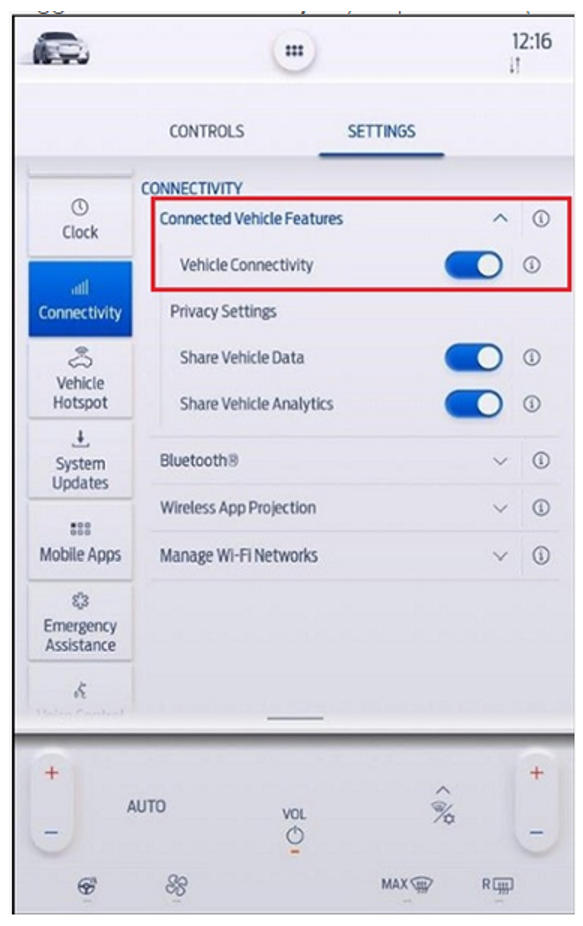
- Press the vehicle image icon on the SYNC 4A touch screen.
- Press Settings.
- Select Connectivity.
- Choose Connected Vehicle Features.
- Toggle Vehicle Connectivity to ON.
Tip: Same as SYNC 4 — keeping Vehicle Connectivity ON is recommended.
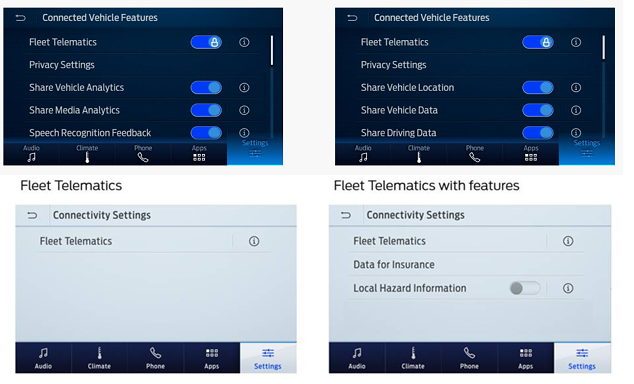
What a Successfully Enrolled Vehicle Looks Like
Once the vehicle has successfully enrolled in Data Services, the in-vehicle screen will display “Fleet Telematics” under the connectivity settings. At that point, this setting is no longer available to disable until the vehicle is unenrolled from Data Services, which is a good sign that everything is working as expected.
If you do not see this, or the vehicle still isn’t reporting after completing the steps above, contact Support and state that the CCS settings steps were completed.
Vehicle Screen Screenshots
| Year/Screen Type | Screenshots |
| 2019/2020 (Non-Touch) | 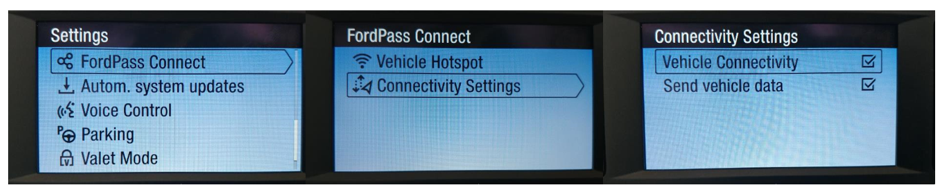 |
| 2019 (Touch) | 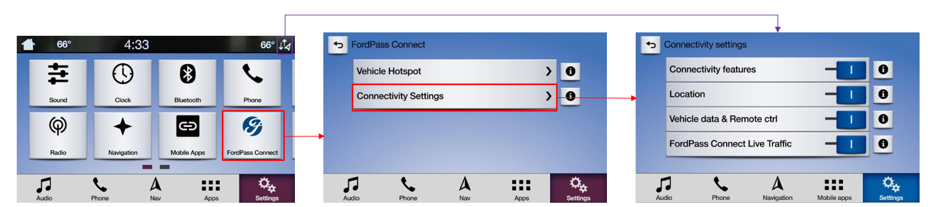 |
| 2020 (Touch) | 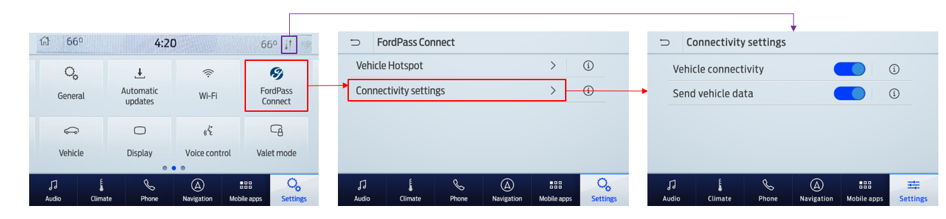 |
| 2021 (Touch – Option A) |  |
| 2021 (Touch – Option B) | 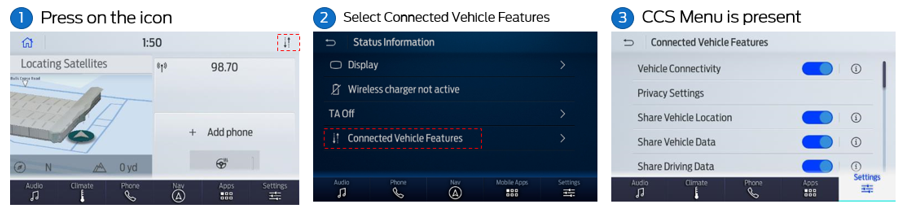 |
| 2022 (Touch) | 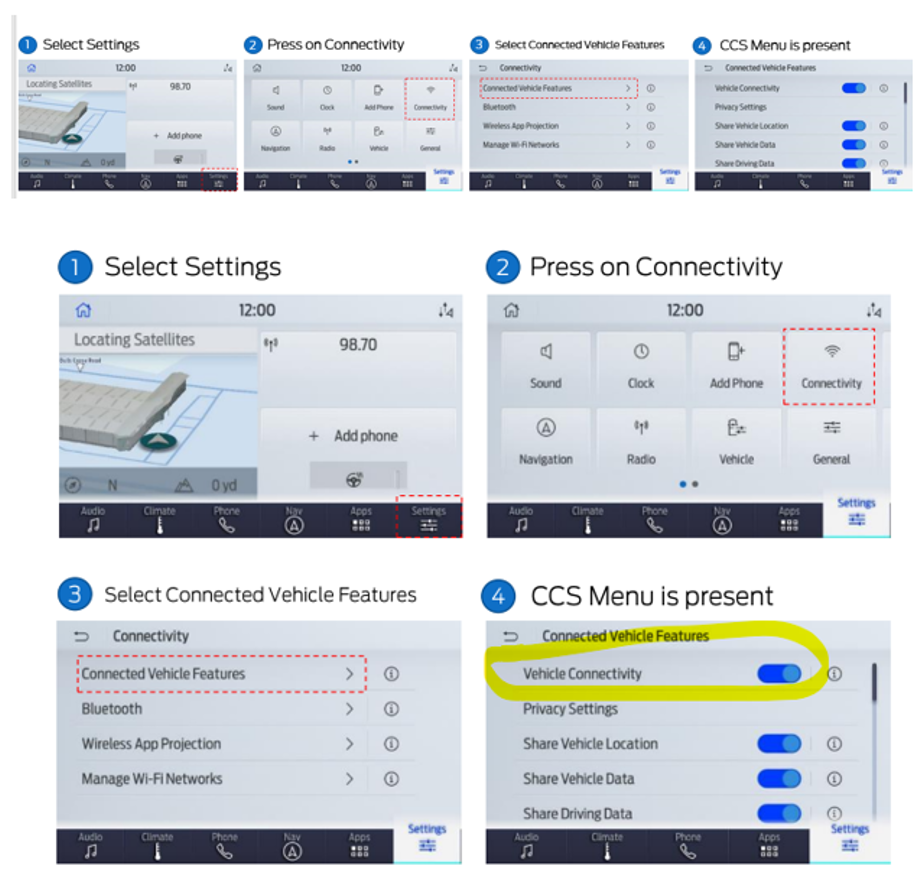 |
Content sourced from CerebrumX – Ford Pro™ Solutions documentation.